The Docking Panel
The numbered workflow that drives every docking study: what each of the six steps asks of you, what the state chips mean, and how the docking mode changes step 4.
A docking study in GeinDock Suite is six steps taken in order down the panel on the left. The panel enforces the order only where the science requires it: you cannot define a binding site before there is a protein to define it on, and you cannot run a job before the receptor, the ligands and the site all exist. Everything else you may revisit at any time.
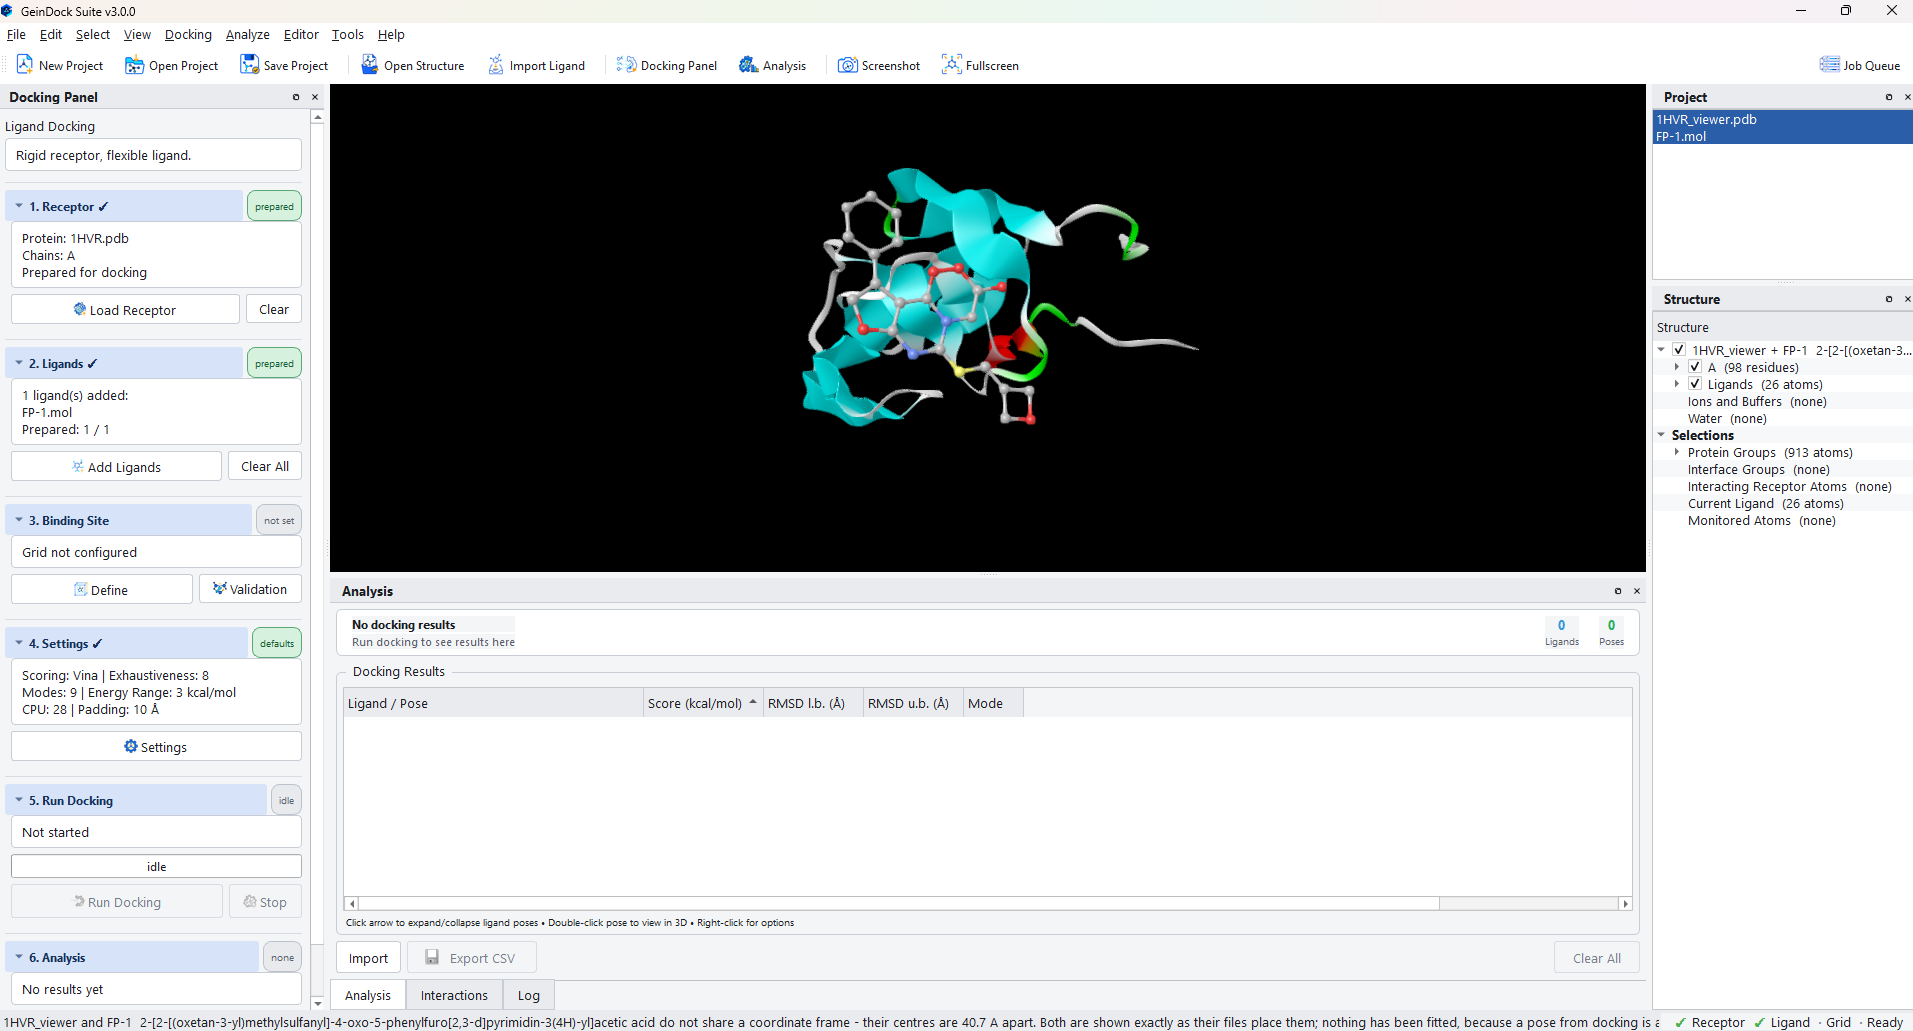
The mode heading
Above step 1, and not numbered as a step of its own, the panel names the docking mode that is active and summarises what it means. The default is Ligand Docking, described as a rigid receptor with a flexible ligand.
The mode is not chosen here. It is chosen from Docking › Docking Mode, and the panel reflects it. The reason is that the mode decides what step 4 even is, so it belongs above the whole list rather than inside it, and putting it in the menu makes it reachable from the keyboard and visible even when the panel is closed.
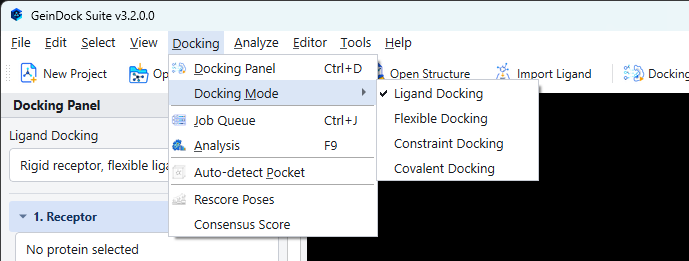
| Mode | What changes | What step 4 becomes |
|---|---|---|
| Ligand Docking | Nothing. The receptor is held rigid and the ligand is free to rotate about its rotatable bonds. | Settings |
| Flexible Docking | Selected receptor side chains are allowed to move during the search. | Flexible Side Chains |
| Constraint Docking | Poses must satisfy geometric conditions that you define. | Constraints |
| Covalent Docking | The ligand is bonded to a named receptor residue. | Covalent Attachment |
The six steps
1. Receptor
Load Receptor opens the protein selection and preparation dialog, where you browse for a file or fetch one from the Protein Data Bank, choose which chains to keep, set the cleanup and protonation options, and run the preparation. When the dialog closes the receptor is ready to dock and the step summary names the file, the chains and its state. Full details are in Step 1: Receptor.
2. Ligands
Add Ligands opens the ligand upload and preparation dialog. Add files, a whole folder, text formulae or a structure you draw, review what was read in the ligand table, then prepare them all in one pass. See Step 2: Ligands.
3. Binding Site
Define opens the grid box dialog, which offers three ways to arrive at a box: cover the whole protein, centre it on a ligand already present in the crystal structure, or set the centre and size yourself. Validation beside it runs a redocking protocol that measures whether the box you have chosen can actually reproduce a known pose. See Step 3: Binding site and Binding site validation.
4. Settings
In ligand docking this is the search configuration: scoring function, exhaustiveness, how many binding modes to keep, the energy window, how many cores to use, and the padding around the site. It always has a value for every field, so it is never incomplete and its chip reads defaults until you change something. See Step 4: Settings.
5. Run Docking
Starts the job. The progress bar names the phase it is in and how far through the whole run it is, and the line above it carries the detail. Stop ends the run. See Step 5: Running a job.
6. Analysis
Open Analysis raises the pose table for the most recent run. It stays disabled until a run has produced poses. See The pose table.
Reading the chips
| Chip | Meaning |
|---|---|
| not set | Nothing has been supplied for this step. |
| loaded | A receptor has been read in, but it has not been prepared, so it cannot be docked yet. |
| added | Ligands are listed, but not all of them have been prepared. |
| prepared | The receptor, or every ligand, is ready for the search. |
| configured | A binding site box has been committed, or a mode picker has been filled in. |
| validated | The committed box has been checked by a redocking protocol and passed. |
| attached | A covalent attachment has been set up. |
| idle | Shown on step 5 whenever no job is running, both before the first run and after one has finished. It is grey because there is nothing to report, not because something is missing. |
| running | A job is in progress. |
| results | Poses exist and can be opened. |
The worked examples used in this guide
The workflow chapters follow one study from a blank window to a ranked pose table, and each mode chapter uses a system that shows that mode at its most characteristic.
| Chapter | Receptor | Why this one |
|---|---|---|
| The workflow and ligand docking | A viral protease with an inhibitor bound in its active site | A small, well ordered two chain enzyme with a clear pocket, which makes every step easy to see. |
| Flexible docking | A protein kinase | Kinase pockets rearrange on binding, which is exactly the case flexible docking exists for. |
| Constraint docking | A serine protease | The catalytic residues make an obvious and chemically meaningful anchor to constrain against. |
| Covalent docking | A signalling enzyme with a covalent inhibitor | The structure carries an explicit link record, so the attachment can be detected rather than assumed. |
You can follow along with any structure of your own. Nothing in the workflow depends on the particular example, and the receptor can be fetched inside the application by its four character identifier.