Binding site validation
Proving that the box and the settings can reproduce a pose that is known to be correct, and reading the report when they cannot.
Every docking result rests on an assumption that is rarely tested: that the box you drew, at the settings you chose, is capable of finding the right answer at all. Redocking validation tests exactly that. It takes the ligand that was crystallised with your structure, docks it back into the receptor, and measures how close it lands to where the crystal put it.
If the software cannot reproduce a pose that is known to be correct, nothing it says about a compound whose pose is unknown carries any weight. This is the single most valuable check in the application, and it costs one run per target.
Validation, beside Define in step 3, opens it.
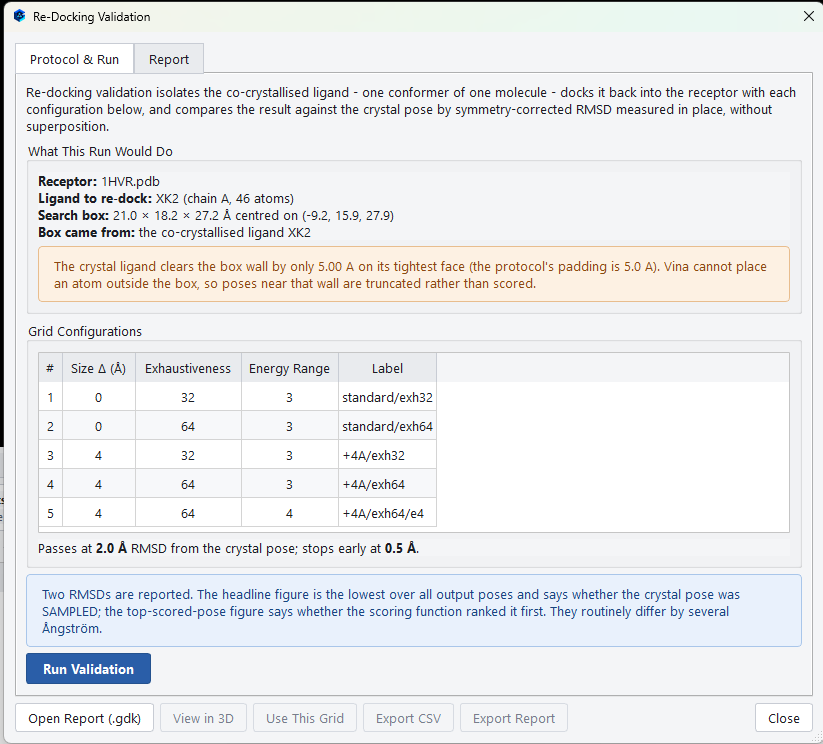
What the run does
The dialog states the protocol in the first paragraph rather than leaving you to infer it. The co-crystallised ligand is isolated as one conformer of one molecule, docked back into the receptor with each configuration in the table, and compared against the crystal pose by symmetry corrected RMSD measured in place, without superposition.
Every clause of that matters.
| Clause | Why it is there |
|---|---|
| One conformer of one molecule | The ligand is taken as it sits in the crystal, so the test is about the search and the box rather than about conformer generation. |
| Symmetry corrected | A symmetric ligand can be mapped onto itself in several ways. Without the correction, a pose that is chemically identical to the crystal pose can score a large RMSD purely because the atom numbering differs. |
| Measured in place, without superposition | The poses are compared where they actually sit. Fitting one onto the other first would hide the very error being measured, which is whether the search put the ligand in the right part of the pocket. |
What this run would do
The summary block reports the receptor, the ligand it will redock with its chain and heavy atom count, the search box, and where that box came from. Read it before you press the button; it is the cheapest way to catch a box that was derived from the wrong ligand.
Underneath it sits the box check, which is the same clearance test the grid dialog performs. When the crystal ligand only just fits, the note says so and explains the consequence: the search cannot place an atom outside the box, so poses that press against that wall are truncated rather than scored, and the validation may fail for a reason that has nothing to do with the docking.
The grid configurations
Rather than test one configuration, the protocol tries several and reports them all. The table lists what will be run.
| Column | What it means |
|---|---|
| # | The configuration number, referred to by the Job Queue as it runs. |
| Size Δ (Å) | How much is added to each edge of your box for this configuration. A row of 0 uses your box as it stands; a row of 4 enlarges it, which tests whether a tight box was the limiting factor. |
| Exhaustiveness | How hard that configuration searches. Two values are tried so that you can see whether more search effort would have helped. |
| Energy Range | The energy window for that configuration. |
| Label | A short name for the configuration, used in the report and in the Job Queue. |
The pass criterion
The protocol passes at 2.0 Å RMSD from the crystal pose and stops early at 0.5 Å. Two Ångström is the long standing convention for a correctly reproduced pose, and stopping early at half an Ångström avoids spending time improving on a result that is already essentially exact.
Running it
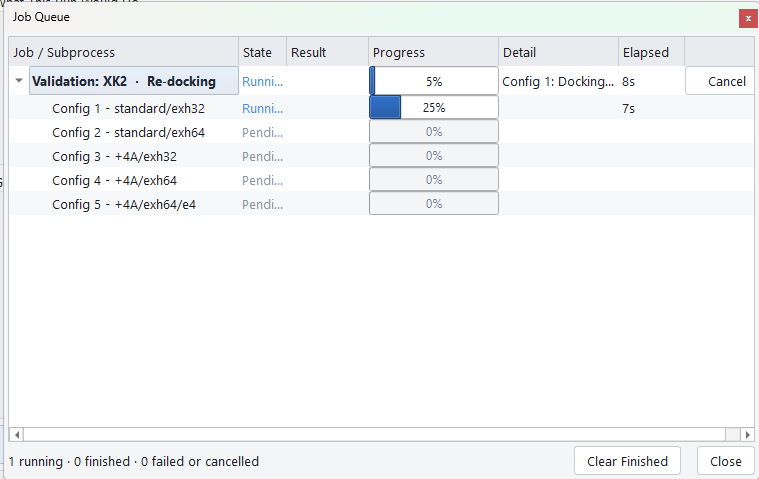
Run Validation queues the sweep. Each configuration appears as its own row in the Job Queue with its own progress bar and elapsed clock, so you can see which configuration is running and how long each one cost.
The report
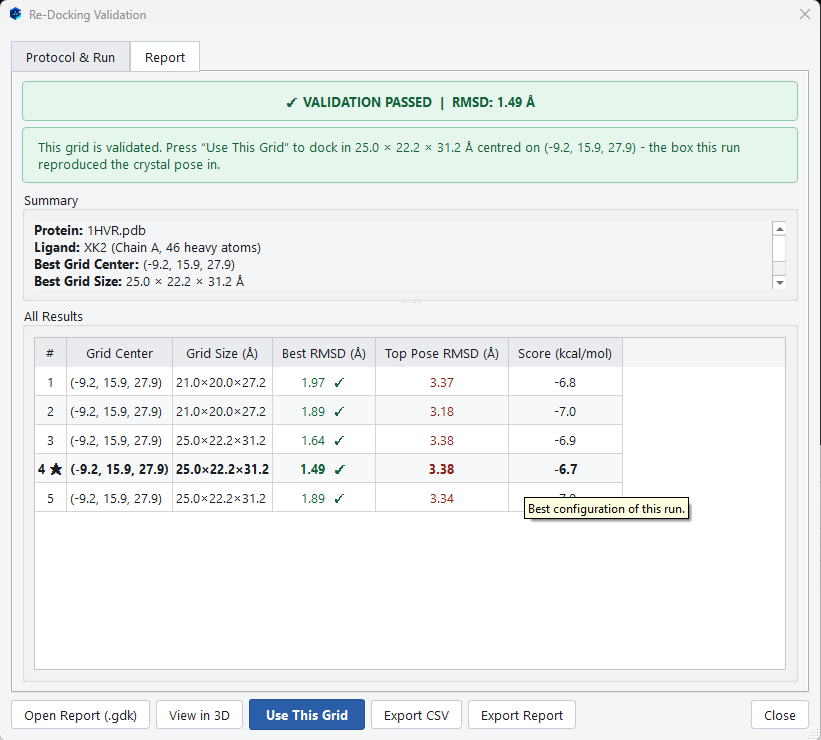
When the sweep finishes, the Report tab fills in.
| Part of the report | What it tells you |
|---|---|
| The banner | The verdict and the best RMSD achieved across the whole sweep. |
| The recommendation | The grid centre and size that reproduced the crystal pose, offered for adoption. |
| Summary | The protein, the ligand and the best grid, in a form you can copy into a methods section. |
| All Results | One row per configuration: its grid centre and size, its best RMSD, its top scored pose RMSD, and the score. The best configuration is marked. |
Reading the results table
| Pattern | What it means | What to do |
|---|---|---|
| Best RMSD below 2 Å in several configurations | The site and the settings are sound, and the result is not a fluke of one configuration. | Adopt the best grid and proceed with confidence. |
| Best RMSD below 2 Å only in the enlarged box rows | Your box was too tight for the search to work in. | Use the enlarged grid, which the report offers directly. |
| Best RMSD below 2 Å but top pose RMSD much higher | The search found the crystal pose and the scoring function did not rank it first. | Look further down the pose list than the top row, and consider a different scoring function or a constraint that expresses what you know. |
| Nothing below 2 Å anywhere | Something upstream is wrong. | Check the receptor preparation, whether the right chain was kept, whether a cofactor or a structural water was needed, and whether the box is centred on the right ligand. |
Adopting the validated grid
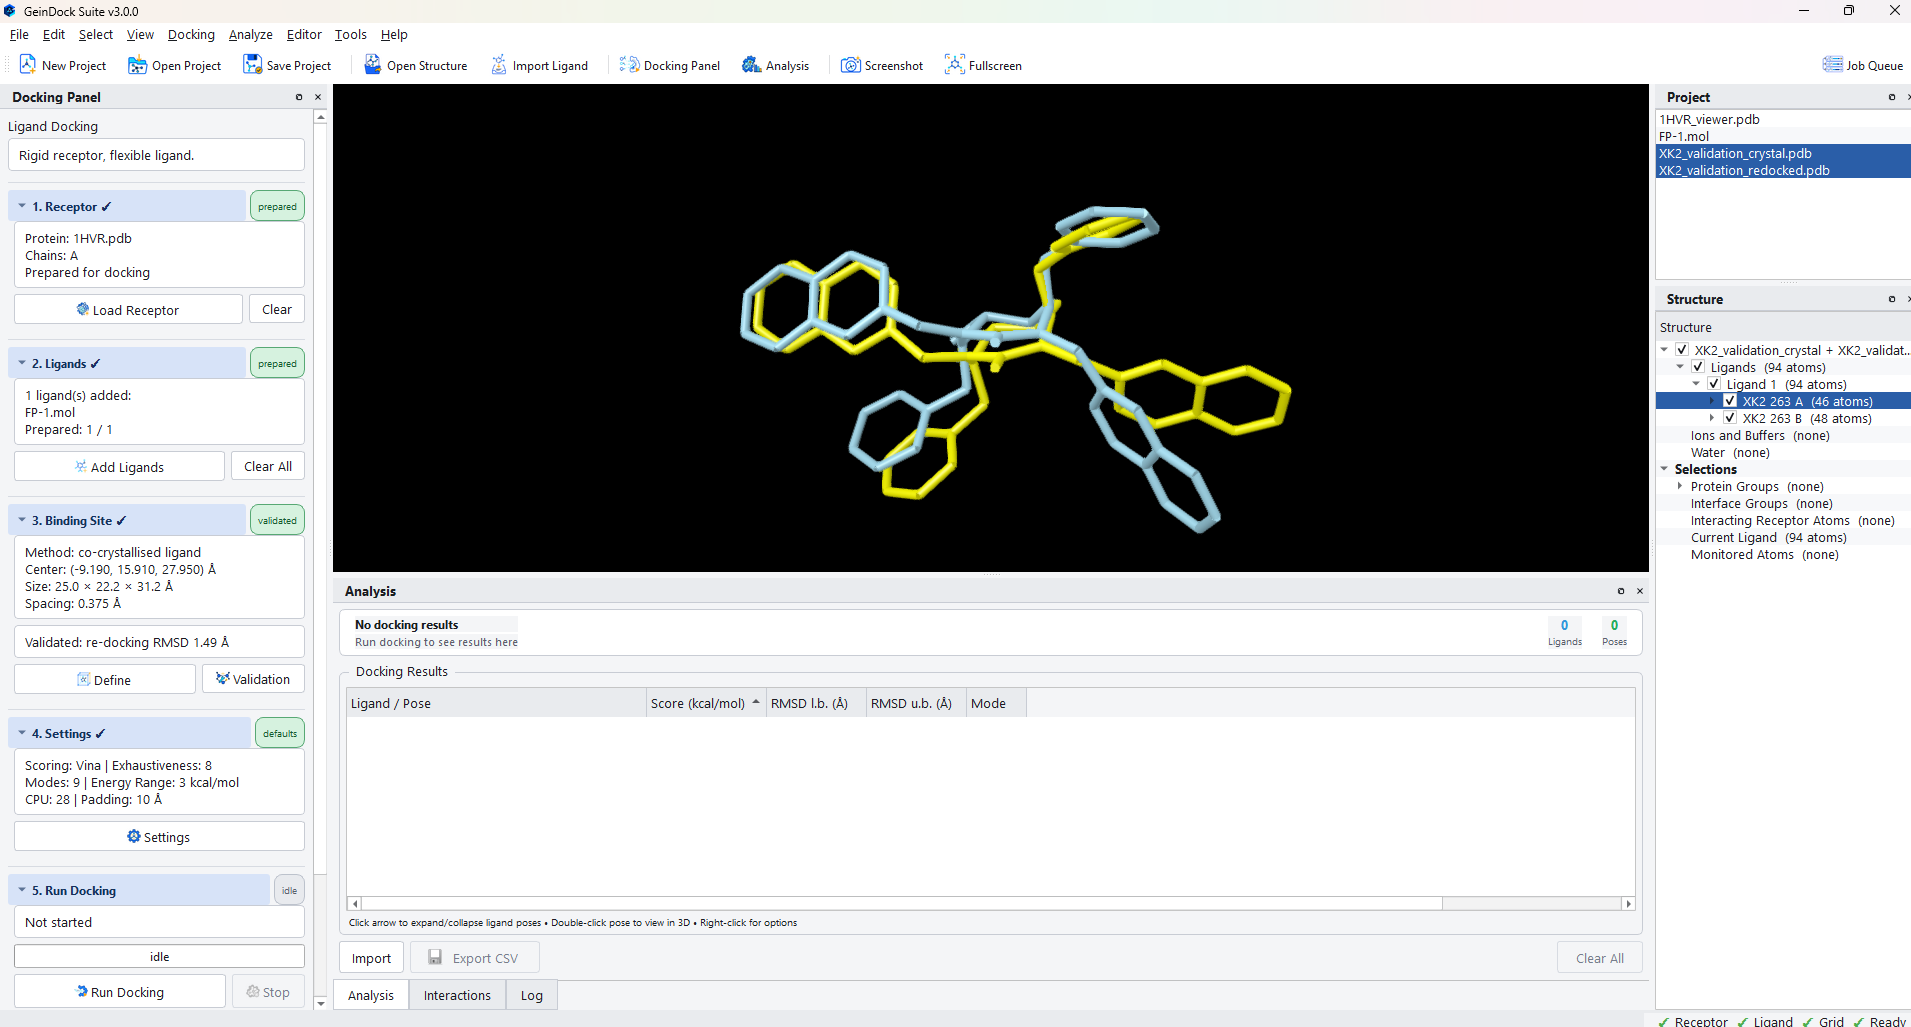
Use This Grid replaces the box in step 3 with the one that passed. The chip on step 3 changes to validated and the summary gains a line naming the RMSD that was achieved, so a project carries the evidence for its own binding site.
View in 3D draws the crystal pose and the redocked pose together, which is the clearest possible statement of what an RMSD figure means.
Exporting the evidence
| Command | What it produces |
|---|---|
| Open Report | Opens the saved report, so a validation run can be revisited long after the session that produced it. |
| Export CSV | The results table as data. |
| Export Report | The whole report as a document, which is what to attach to a methods section or a study record. |