Constraint docking
Stating a geometric condition that a pose must satisfy, how each kind of constraint reaches the search, and how to read a run whose condition was not met.
Sometimes you know something about the answer before you start. A series may be known to hinge on a hydrogen bond to one catalytic residue. A scaffold may be known to sit exactly where a crystallised analogue sits. A pharmacophore model may say that a basic nitrogen has to reach a particular acidic pocket. Constraint docking lets you state that knowledge and have it enforced, instead of hoping an unconstrained search stumbles onto it.
Select Docking › Docking Mode › Constraint Docking. Step 4 becomes Constraints.
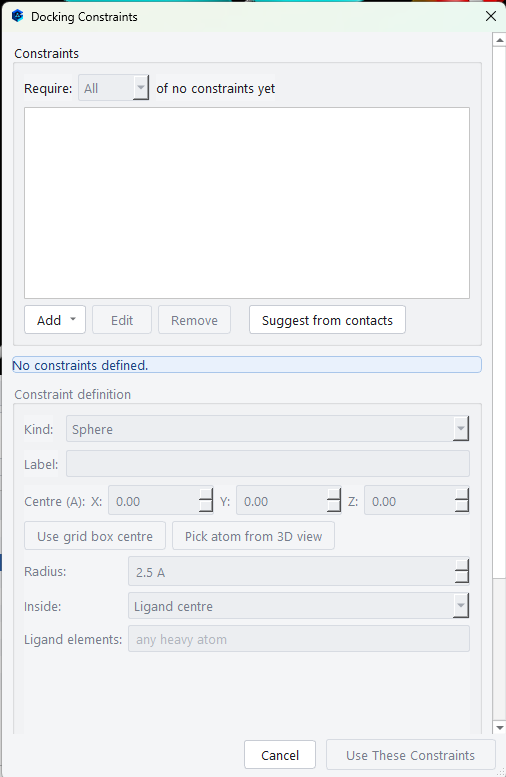
How a constraint reaches the result
This is the part most worth understanding, because it decides what a constraint can and cannot promise. The search has no general restraint term, so a constraint acts through one of three mechanisms depending on what kind it is, and the dialog names the mechanism in force whenever you select a constraint.
| Mechanism | What it does | Which kinds use it |
|---|---|---|
| Biased sampling | The constraint is turned into an attractive feature that steers the search itself towards satisfying it. This is the only mechanism that changes what gets sampled. It steers but it does not guarantee, so the poses are still measured afterwards. | Sphere, distance, hydrogen bond |
| Generative | The pose is built already obeying the restraint and is then only locally optimised. Nothing that violates the restraint is ever generated. | Core, or scaffold |
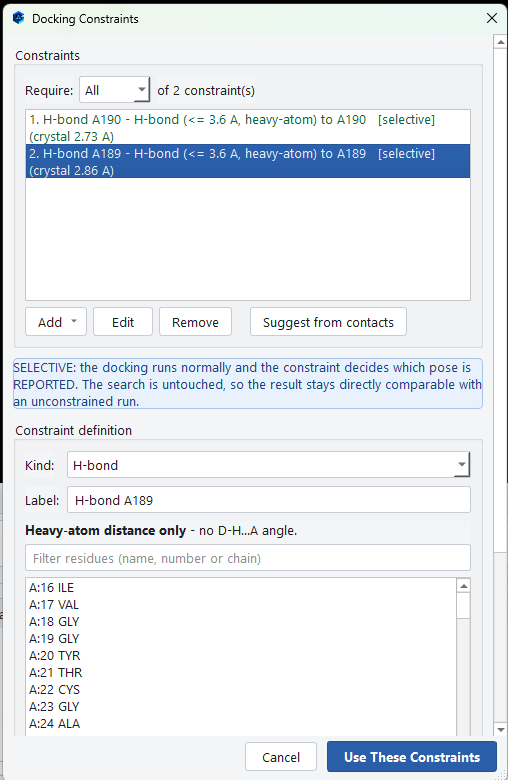
| Selective | The search runs normally and the reported poses are then filtered. This changes which pose you are shown, not what was explored, so the result stays directly comparable with an unconstrained run. | Whole ligand RMSD, and the final check applied to all kinds |
Adding a constraint
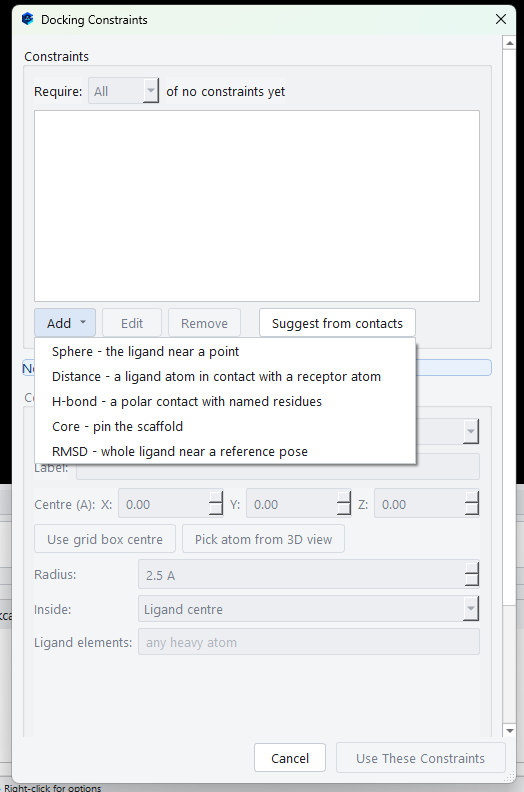
Add offers the five kinds, each with a one line description of what it asks for.
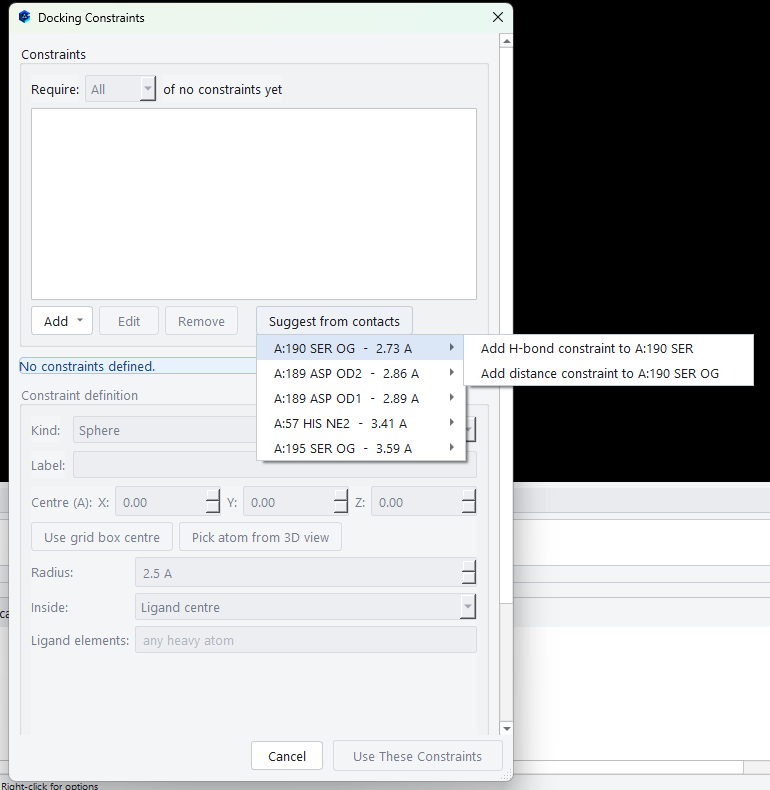
Suggest from contacts is the quickest way to start. It reads the contacts the crystal ligand makes with the receptor, lists them with their distances, and offers to turn each one into either a hydrogen bond constraint or a distance constraint. That gives you a defensible starting point rather than a guess.
The five kinds of constraint
Sphere
Requires the ligand to be positioned at a point in space, within a radius you set. The Inside control decides what has to be there.
| Setting | Meaning | When to use it |
|---|---|---|
| Ligand centre | The ligand's own centre of geometry must lie within the radius. | The default, and the honest reading of put the compound here. |
| Any atom | Some qualifying ligand heavy atom must lie within the radius. | Rarely what you want on its own, for the reason below. |
Use grid box centre fills the coordinates from the box you already defined, and Pick atom from 3D view lets you click the location in the viewer. Ligand elements narrows which ligand atoms qualify, for example to nitrogen and oxygen only.
Distance
Requires a ligand heavy atom to lie between a minimum and a maximum distance of one named receptor atom. Both bounds matter. Without a lower bound, physically impossible contacts satisfy the test, so the default window runs from 2.4 to 4.0 Å, which is the range a real non bonded contact occupies.
H-bond
Requires a ligand nitrogen, oxygen or sulfur to come within the distance limit of a nitrogen, oxygen or sulfur of one of a set of named receptor residues. This is the kind to use when a series is known to depend on a specific polar contact, and naming several residues lets any of them satisfy it. The test is on heavy atom separation and does not include a donor angle, which the dialog states plainly so that you know what is being measured.
Core
Requires named scaffold atoms to sit within an RMSD tolerance of a template, usually a crystallised analogue. This is scaffold constrained docking, and it is the right tool when you are exploring substituents around a core whose binding mode is already known. Because it is generative, poses are built obeying it from the start.
RMSD
Requires the whole ligand to sit within a tolerance of a reference pose. Use it to test whether a compound can adopt a specific known binding mode at all, rather than to discover a new one.
Requiring some rather than all
By default every constraint must be satisfied. The Require control at the top of the dialog changes that to at least N of M.
Reading the result
Two columns appear in the pose table that no other mode fills in.
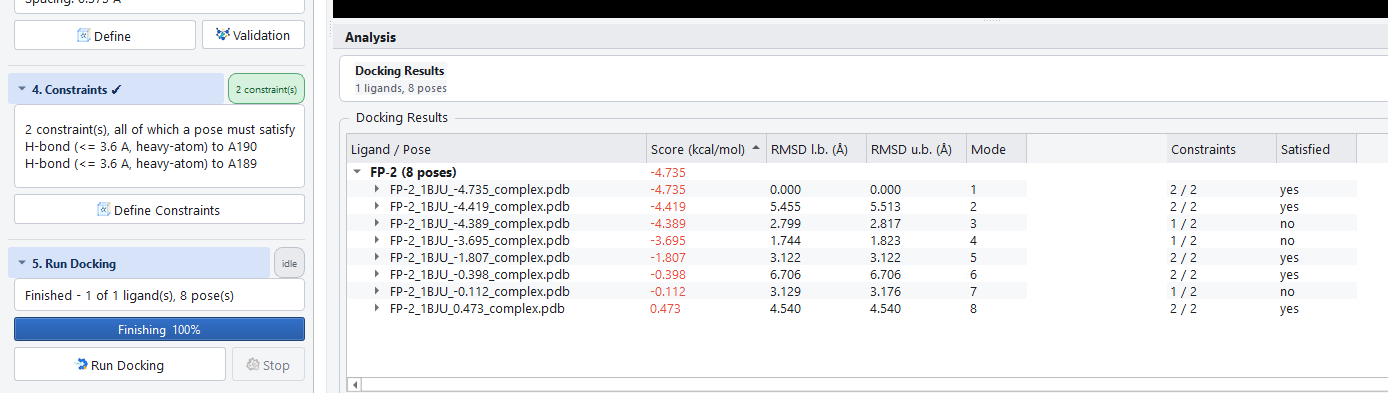
| Column | What it tells you |
|---|---|
| Constraints | How many constraints were in force for this run, and how many this pose meets, written as a fraction. |
| Satisfied | Whether this pose meets the requirement, taking the Require setting into account. |
The job's verdict summarises the same thing for the run as a whole. A run in which no pose met the requirement is reported as a criterion that was not met, and it is not treated as a failure, because the poses it produced are real and are worth examining.
A suggested way to work
- Dock without constraints first. You need to know what the unconstrained search does before you can tell what constraining it changed.
- Start from the contacts you can see. Suggest from contacts builds constraints from the crystal ligand's own interactions, which is a defensible starting point rather than a guess.
- Constrain one thing at a time. Add a single constraint, run, and look at how many poses satisfied it. That tells you whether the constraint is doing any work.
- Loosen the requirement rather than the constraints. If several constraints together give nothing, set Require to a smaller number before you start widening tolerances. Weakening each individual condition makes them all less meaningful; requiring fewer of them keeps each one as strict as it was.