Installing the software
OptiGein Design comes as one download per platform, and each download already contains everything the program needs to run. This page walks through the install on Windows and Linux, and shows how to remove it again.
Before you start
You do not need to install anything else first. The download carries its own copy of the Qt runtime the program is built on, and on Windows it also carries the Microsoft C++ runtime. So there is no separate Qt install, no Visual C++ redistributable and no other dependency to chase down. On Linux, the few system libraries the program uses, for the display, fonts, printing and secure connections, come from your distribution, and the package manager installs any that are missing. The application is 64-bit only.
| Platform | You need | Download |
|---|---|---|
| Windows | 64-bit Windows 10 or later | OptiGein-Design-<version>-Windows-x64-Setup.exe |
| Linux | 64-bit Ubuntu 22.04 or Debian 12, or newer | optigein-design_<version>_amd64.deb |
| macOS | Not available yet | |
Installing on Windows
The Windows download is a single self-extracting setup file. When you run it, a small stub unpacks the compressed payload, the program, its Qt runtime and the setup wizard, into a temporary folder, then starts the wizard from there. Nothing is written to your system until you reach the Install step, so you can cancel at any point before that and leave the machine untouched.
The wizard has five short pages. Here is what each one asks of you.
- Start the installer. Double-click the setup file and approve the Windows administrator prompt. The wizard opens with a title banner that shows the version you are about to install.
- Welcome. The first page tells you what you are installing. There is nothing to fill in, so read it and click Next.
- License Agreement. The full license text is shown in a scrolling box. Tick I accept the terms of the license to turn on the Next button, then click Next. If you do not accept, you cannot go on.
- Install Location and Options. This is the only page with real choices. The
install folder defaults to
C:\Program Files\OptiGein Design; use Browse to pick another folder if you prefer. If the folder you pick already holds other files, setup installs into anOptiGein Designfolder inside it, so your files are never mixed with the program's. Below it are four options, all on by default:The page also shows the disk space the install needs. When the options look right, click Install.Option What it does Create a Start Menu shortcut Adds OptiGein Design to the all-users Start Menu. Create a Desktop shortcut Puts a shortcut on the shared desktop for every account. Open .ogdx design files with OptiGein Design by default Makes the program the default for the .ogdxdesign format, so a double-click opens the design.Launch OptiGein Design when setup finishes Opens the program as soon as you click Finish. - Installing. A progress bar tracks the work as setup copies the files, creates
the shortcuts you asked for and registers the
.ogdxfile type. This takes a few seconds. You cannot cancel once copying has begun. - Setup Complete. The last page confirms where the program was installed and reminds you that you can start it from the Start Menu or the desktop shortcut, and remove it later from Windows. Click Finish. If you left the launch option ticked, the program opens right away.
Where the program is installed
By default the program lands in C:\Program Files\OptiGein Design. That folder holds
the main program, OptiGeinDesign.exe, a small helper that doubles as the uninstaller,
the Qt runtime libraries, the C++ runtime files and a copy of the license. The shortcuts, if you
kept them, go to the all-users Start Menu and the shared (Public) desktop, so every account on the
machine sees them. Setup also adds an entry to the Windows list of installed apps so you can remove
the program cleanly later.
Opening designs by double-click
OptiGein Design saves your work in files with the .ogdx extension. If you left the
file-association option ticked during setup, Windows now knows that .ogdx files belong
to OptiGein Design. From then on, double-clicking any design file opens it straight in the program,
and those files show the OptiGein Design icon in File Explorer.
Uninstalling on Windows
Open Settings, go to Apps, then Installed apps (on older Windows this
is Programs and Features in Control Panel). Find OptiGein Design in the list and choose
Uninstall. Windows asks for administrator approval again, the uninstaller asks you to
confirm once, and then it removes the shortcuts, the .ogdx association, the registry
entry and the program files. From version 1.5.0, the default folder in Program Files is removed
whole; anywhere else, only the files setup put there are removed, and anything else in that folder
is left alone.
Installing on Linux
From version 1.5.0, OptiGein Design runs on Linux. It comes as a Debian package (a
.deb file) for 64-bit Ubuntu 22.04 or Debian 12 and newer, and for distributions built
on them. The package installs the program with its own Qt runtime under
/opt/optigein-design, adds it to the applications menu and registers the
.ogdx design format.
- Install the package. Open a terminal in the folder you downloaded it to and
run
sudo apt install ./optigein-design_<version>_amd64.deb, with the version of your download in place of<version>. Keep the./in front of the file name: it tells apt to install that file instead of searching for the name online. apt asks for your password and installs any system library the program needs that is missing. - Start it. Choose OptiGein Design in the applications menu, or run
optigein-designin a terminal. Double-clicking an.ogdxfile in the file manager opens it in the program.
Uninstalling on Linux
Run sudo apt remove optigein-design. This removes the program, its menu entry and
the .ogdx file type. Your license and settings, which are kept in your home folder, are
not removed, so installing the package again later does not need a new activation.
macOS
A macOS version of OptiGein Design is not available yet. If you need it, contact Geinforce and we will let you know when it is ready.
Keeping the software up to date
OptiGein Design does not update itself behind your back. You decide when to look for a new version, and nothing is downloaded until you say so. An update keeps your license, your settings and your saved designs.
Updating on Windows
- Save your work, then choose Help › Check for Updates. The software
asks the Geinforce server for the latest version. This needs an internet connection.
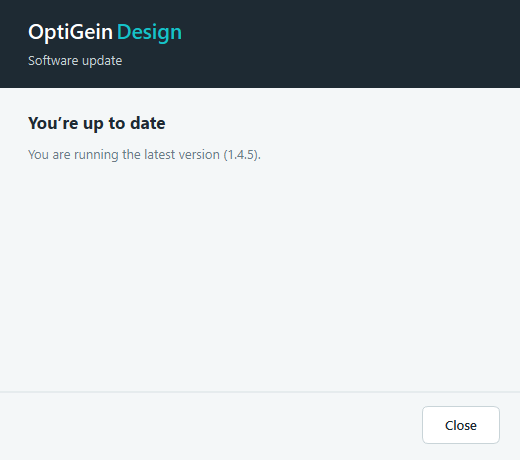
The Software Update window when there is nothing newer to install. - If you already have the latest version, the window says You're up to date and you can close it. If a newer one exists, it says Update available and shows the new version number, your current one, the download size and a list of what changed.
- Click Update Now. A progress bar follows the download. When it finishes, the software checks the file against the fingerprint published by Geinforce, so a damaged or altered download is thrown away instead of being run. Click Later if you would rather not update yet; you can check again whenever you like.
- When the window says Ready to install, click Install & Restart. OptiGein Design closes, Windows asks for administrator approval once, the new version is installed into the default Program Files folder with no wizard to click through, and the program opens again.
Updating on Linux
On Linux the package manager looks after the installation, so the program downloads the update for you but you install it with apt.
- Choose Help › Check for Updates. If a newer version exists, the window says Update available, as on Windows.
- Click Download Update. The package is downloaded, checked against the fingerprint published by Geinforce, and saved in your Downloads folder.
- The window says Update downloaded and shows the command that installs it, starting
with
sudo apt install. Click Copy Command, close OptiGein Design, then paste the command into a terminal and run it.
apt replaces the old version. Your license, settings and designs stay where they are. You can also
download the new package from My License on geinforce.com and install it the same way as
the first time: sudo apt install ./optigein-design_<version>_amd64.deb.
If an update does not go through, see Troubleshooting.
Next: activate your copy
Installing puts the program on your machine. Before you can build designs with it, you enter your license once. That is covered next in License and activation.